
How to Wash Your Car (Properly)
Okay, you might think that cleaning your car is as easy as a bucket, some rags, some soap and a hose. Well, my friend, you would be wrong…really wrong. Grandpa may have used these items on his car. His car may have looked fine to you. But let’s face it that was when you could have a Model-T in any color you wanted–as long as the color was black.
Today, with the advancement of solvents and solutions that can degrease, de-grime, and destroy all kinds of things, you may be doing a lot more damage to your car’s paint than you might think.
Today we’re going to talk about how a few modifications to the items you use and the ritual in which you use them can make a huge difference not only in how your ride looks after a good scrub down, but also ensure that showroom shine lasts for years to come.
Wheels first! – Yes, you read that correctly, wheels first. Unlike your dishes, you want to start with the dirtiest part of the car first. Tires and wheels spend the most time in the dirt and by default are the dirtiest. They also have a tendency to collect brake dust and debris.
In fact, it’s a good idea to have a separate bucket just for the wheels. Wheel gunk removing solvents are made to remove that gunk and can remove your paints finish right along with it. Wash the brushes and sponges between wheels or you may just be adding dirt to dirt by the time you get to the last wheel.
Pre-rinse– You may already know this one, but did you know there is a method to HOW you should do your pre-rinse? Ah! Now we have your attention. Are you ready for the secret?! Use gravity. Start at the top of the car and work your way down being sure to pay attention to any spots that are particularly soiled such as bird droppings, tree sap, etc. You may have to pre-soak these areas with car cleaner prior to removing them properly.
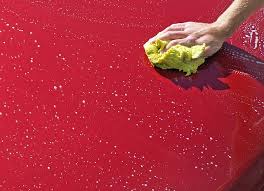
Main Wash– Use a proper car washing cleaning fluid mixed with water. Some people like using a sheepskin mitt and others microfiber towels. At this point, it’s really your call. The key here is to once again start at the top and work your way down… with some changes. (Side note: something else to consider getting is a grit guard; it helps keep grit from getting back into your towel/mitt and back onto the car!) First, you are going to only use up and down motions on the roof, hood, and trunk; no swirling or side to side motions thank you! Depending on how warm it is you might want to rinse the area first to ensure it doesn’t dry out with the soap still on it! Move on to the sides and front/back using the same up and down method.
Rinse it off! – You probably guessed it, there’s a special way to do this too! Ready? Rinse off bottom to top. The reason for this is that you see areas you might have missed and you give the rest of the car a good rinsing too, ensuring all soap has been eliminated. Some experts suggest removing the nozzle of your hose to create a “sheeting” effect on the car to reduce drying time and the chance for water droplets to cause spots.
Dry it off – Microfiber towels are best for this job. If you really want to go fancy, use a waffle weave microfiber towel. If you don’t have one available, a regular microfiber will be just fine. You don’t need much pressure. In fact, some people just drag the microfiber lightly over the surface. This can leave a little water that can evaporate. If you want, now is a good time to use a little spray wax applied to the towel.
Voila! You’re done! For this and more great tips visit us on the web at the Roseville Automall Blog. If you liked this article let us know, or leave your own tips/tricks on how to keep your ride looking great.
If you are looking for used cars in Sacramento, Ca, turn your attention to the experts at the Roseville Automall. Our experienced staff and stunning showrooms not only prove that we know how to wash cars, but we know how to get you into the right car or truck that fits your needs!
The Roseville Automall – Driven To Be The Best!!!